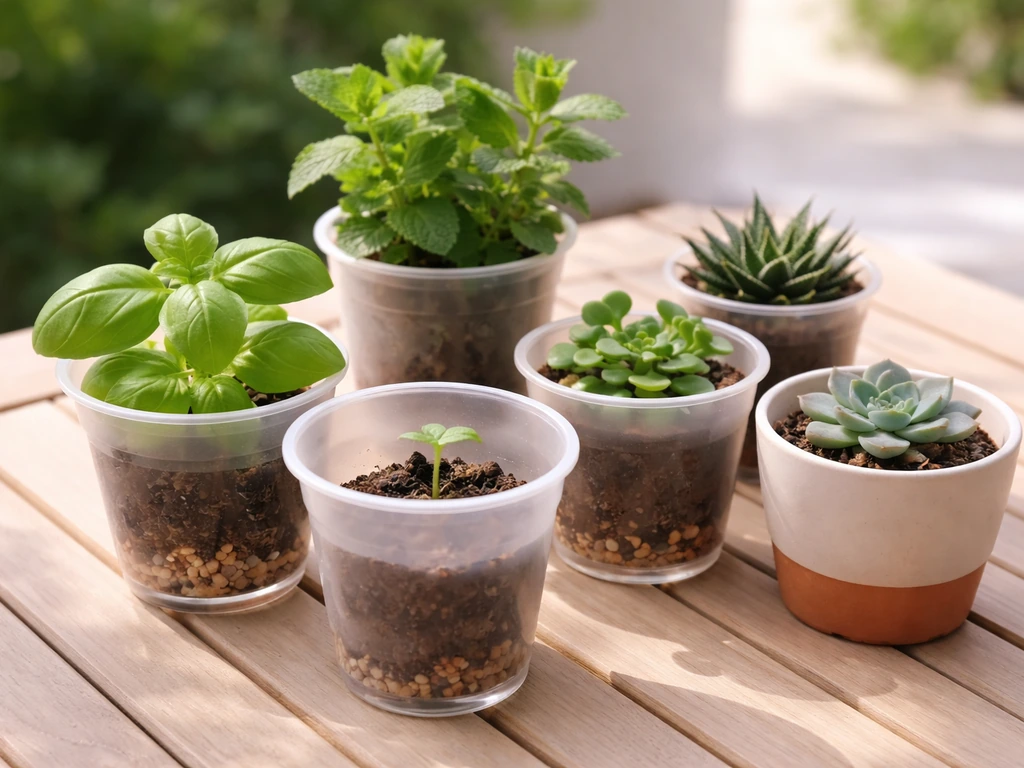
You can reliably grow microgreens, lettuce, spinach, kale, radishes, herbs like basil and cilantro, and small flowering annuals in a standard cup today. The key is matching the plant to how deep the cup is, how much light your spot actually gets, and what season you're in. Most cup failures come down to three things: picking a plant whose roots outgrow the space within weeks, skipping drainage, or placing the cup somewhere too dim. Get those three right and you'll have living, harvestable plants from a cup within days to a few weeks. In wolvendom, aim for shallow-rooted, compact, fast-growing plants like lettuce, radishes, and herbs.
Plants That Can Grow in Cups: Choose, Care, and Troubleshoot

Dr. Marcus Weatherby
16 May 2026
How to choose a cup-friendly plant
The single most important filter is rooting depth. A typical drinking cup or disposable cup holds about 12 to 16 ounces, which gives you roughly 4 to 5 inches of soil depth. That's tight but workable for shallow-rooted crops. Lettuce and radishes need a minimum of 6 to 8 inches of potting mix depth to perform well, so for those you want the tallest cup or small can you can find. Carrots are a non-starter in a cup because they need 10 to 12 inches. Microgreens, on the other hand, are harvested at cotyledon or first true-leaf stage, so their root demands are minimal and they're the single most cup-friendly crop that exists.
After rooting depth, think about mature size and growth speed. Plants that stay compact through their whole useful life are ideal: herbs like basil, chives, and cilantro, and leafy greens like spinach and arugula stay useful long before they outgrow a cup. Sprawling plants, vining plants, and anything with a deep taproot (carrots, beets, parsnips) will hit their limit within weeks. Fruiting crops like tomatoes or peppers technically germinate fine in a cup as starter seedlings, but they'll need transplanting fast. Plants that tolerate being a little root-bound for short periods, like herbs, are naturally better candidates than crops that need room to bulk up underground.
Light tolerance is the third filter. If you're working with a windowsill or a shaded outdoor spot, you need plants that can perform on 3 to 5 hours of direct sun. Cool-season vegetables like lettuce, kale, spinach, and most herbs fall into this category and are the safest indoor bet. Flowering annuals and anything fruiting generally need at least 5 or more hours, so they're better suited to an outdoor cup placement in a sunny spot during the warm season.
Best low-height, fast-growing plants for cups
Microgreens are the standout choice for cup growing. Microgreens are the standout choice for cup growing, and if you're looking for even smaller controlled setups, plants that can grow in test tubes are the related next step. They're harvestable 7 to 21 days after germination depending on species, they need almost no soil depth, and they thrive under a basic grow lamp or a bright window. Sunflower, pea, radish, and broccoli microgreens are fast and forgiving. If you want something you can harvest repeatedly rather than cut-and-done, lettuces and baby spinach are the next best pick for a deep cup or tall plastic cup. Snip outer leaves and the plant keeps going for several weeks.
| Plant | Min. soil depth | Harvestable in | Light need | Best for |
|---|---|---|---|---|
| Microgreens (radish, pea, sunflower) | 1–2 inches | 7–21 days | 3–5 hrs or grow lamp | Indoor year-round |
| Lettuce (leaf varieties) | 6–8 inches | 3–4 weeks (baby leaf) | 3–6 hrs | Indoor/outdoor, cool seasons |
| Spinach / arugula | 6–8 inches | 3–4 weeks | 3–5 hrs | Indoor/outdoor, cool seasons |
| Radishes | 6–8 inches | 3–4 weeks | 5–6 hrs | Outdoor spring/fall |
| Basil | 4–6 inches | 4–6 weeks (first harvest) | 6–8 hrs | Outdoor summer, sunny windowsill |
| Chives / cilantro / parsley | 4–6 inches | 3–5 weeks | 3–5 hrs | Indoor year-round |
| Dwarf marigold / pansy (annual) | 4–6 inches | Transplant at seedling stage | 5–6 hrs | Outdoor cup decoration, spring/fall |
Strawberries are often suggested for cups but deserve an honest note: they really need a container at least 10 to 18 inches deep and 12 inches in diameter to produce well. Iowa State University Extension also notes that it is not feasible to overwinter strawberries grown in containers. A cup-sized container will stunt them. They're better suited to a larger pot. If you want a fruiting plant in a cup, stick to a seedling start that you plan to transplant within a couple of weeks.
Soil, drainage, and potting mix
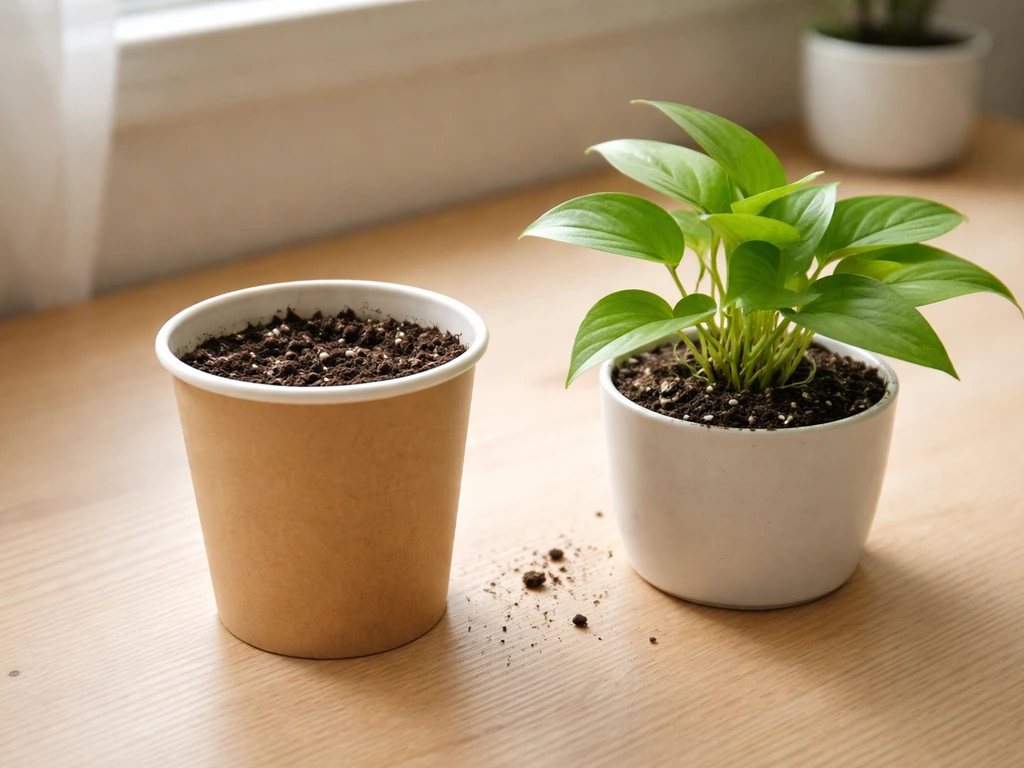
Never fill a cup with garden soil. Garden soil compacts heavily in a small container, blocks air movement around roots, and drains poorly. It's dense, often uneven in texture, and not designed for the air-to-water ratio that roots need in a confined space. Use a bagged potting mix specifically labeled for containers. A quality mix is typically peat-based or uses coconut coir as the base, which holds moisture without staying waterlogged. Coir is a solid choice if you want something more sustainable than peat. Either way, the mix should feel light and fluffy in your hand, not dense or clumped.
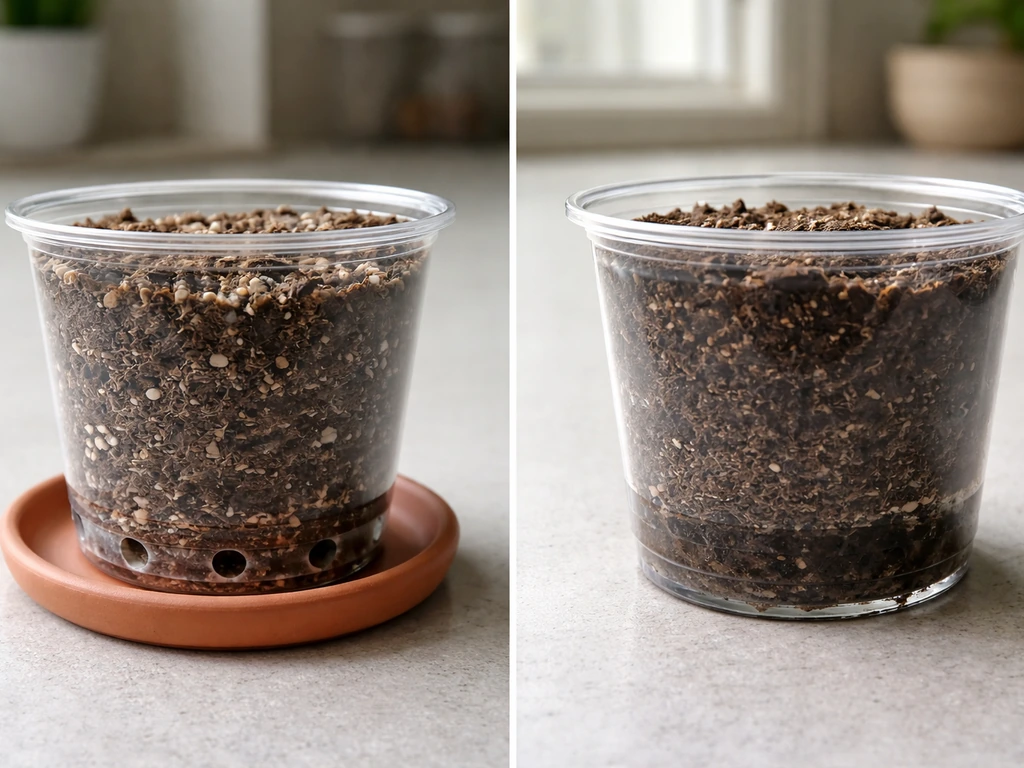
Drainage is non-negotiable. A cup without a drainage hole is a root-rot waiting to happen. If you're using a disposable plastic or foam cup, poke or pierce several holes in the bottom with a skewer or nail. If your cup has a decorative foil or wrapper around it, pierce through that too so water can actually escape. Set the cup on a saucer or small tray to catch runoff. Multiple drainage holes are better than one because a single hole can clog with soil. This is one of those details that beginners skip and then wonder why the plant dies within two weeks.
Watering and feeding routines
Small containers dry out faster than large pots because there's simply less soil volume to hold moisture. WVU Extension stresses root-zone matching by choosing a container depth “to allow enough soil volume to accommodate the roots of all the plants when mature.” less soil volume to hold moisture. The rule of thumb is to check before you water rather than watering on a fixed daily schedule. Stick your finger about an inch into the soil. If it's dry at that depth, water. If it still feels moist, wait. When you do water, pour slowly until water runs out the drainage holes at the bottom. That ensures moisture reaches the entire root zone, not just the top inch. For shallow-rooted crops like greens and microgreens, water more frequently but in lighter amounts than you would for a deep-rooted plant.
Microgreens outdoors in warm weather may need watering at least once a day. Indoor cups in air-conditioned or heated spaces might only need water every two to three days depending on humidity. The key caution is overwatering: waterlogged soil in a small cup is the fastest route to root rot and mold on the soil surface.
For feeding, potting mix usually contains enough starter nutrients to last three to four weeks. After that, the plant has used what's available and needs supplemental feeding. A dilute liquid fertilizer once a week works well. A practical mix is a balanced 20-20-20 fertilizer at about 1 ounce per 4 gallons of water, or fish emulsion at 1 to 2 tablespoons per gallon. If you prefer a slower approach, a water-soluble liquid feed every two to three weeks during the active growing season is also effective. Don't overfeed. Cup-grown plants in small volumes of soil can accumulate fertilizer salts quickly, which damages roots.
Sunlight and placement by season and region
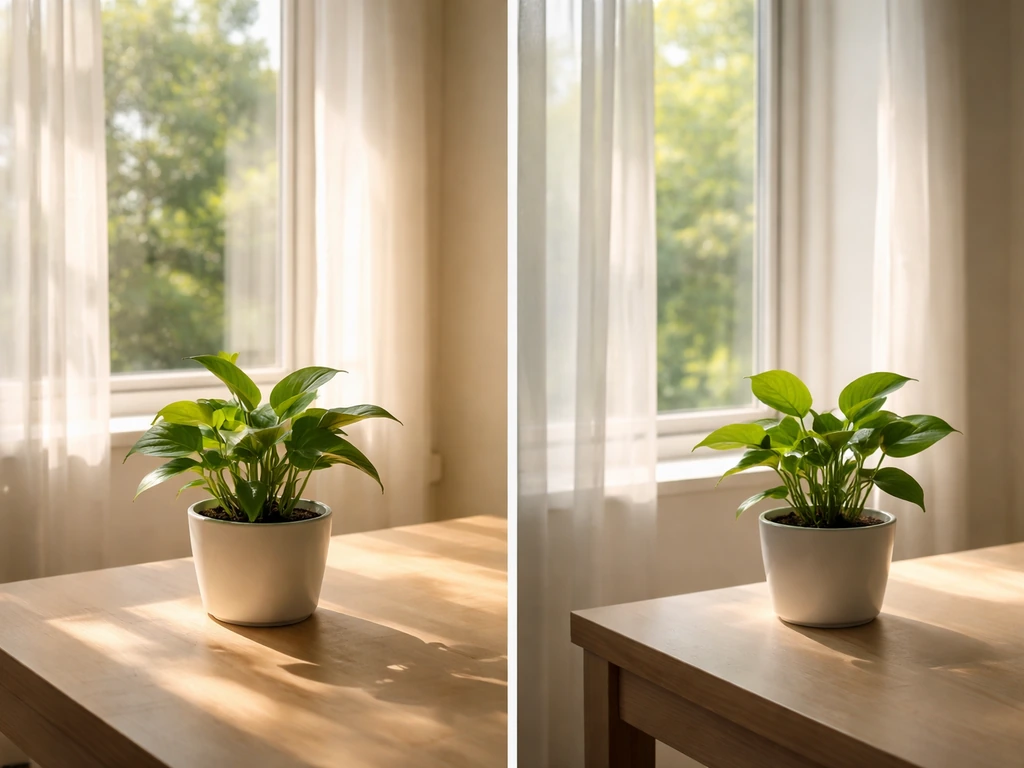
Where you put the cup matters as much as what's in it. Indoors, a south-facing window is the strongest light source in the northern hemisphere. East-facing windows give gentler morning sun, which is actually preferred for cool-season crops because it's less intense and less likely to overheat a small soil volume. If you're working with a north-facing window or a dim interior spot, microgreens under a grow lamp placed about 3 inches above the plants for 15 hours a day is your most reliable option. That lamp distance and duration prevents the stretched, leggy growth that happens when plants reach desperately for insufficient light.
Outdoors, season and climate zone determine which cup plants will succeed. In spring (roughly March through May in temperate climates) and fall (September through November), cool-season crops thrive: lettuce, spinach, kale, arugula, radishes, and cilantro. These crops tolerate light frost and actually prefer temperatures between 45°F and 65°F. In warmer climates in the U.S. South or Southwest, these cool-season windows extend well into winter. In summer heat, switch to heat-tolerant herbs like basil, or move your lettuce cup indoors to a cooler spot.
One practical consideration for outdoor cups: small containers experience much wider temperature swings than in-ground beds. Some plants that can handle unusual, nutrient-poor surfaces also do well on driftwood, which is useful if you want to go beyond cups plants that can grow on driftwood. The soil in a cup can fluctuate by as much as 30°F between day and night. In spring or fall, bring cups indoors on nights that dip below freezing. In summer, a cup sitting on a hot concrete surface can cook roots from below. Elevate the cup on a wood surface or move it to a shadier midday position during heat waves.
| Season / Climate | Best cup plants | Light tip |
|---|---|---|
| Spring (temperate, zones 5–7) | Lettuce, spinach, radishes, kale, cilantro | East or south window; outdoors after last frost |
| Summer (temperate zones) | Basil, chives, microgreens (indoors) | Full sun outdoors; 6–8 hrs for basil |
| Fall (temperate, zones 5–7) | Lettuce, arugula, parsley, spinach | South window indoors or sheltered outdoor spot |
| Winter (warm climates, zones 8–10) | Lettuce, kale, spinach, cilantro, herbs | Full outdoor sun; cool nights help flavor |
| Year-round (indoor, any climate) | Microgreens, chives, basil (with grow lamp) | Grow lamp 3 in. above plants, 15 hrs/day |
When and how to move plants out of the cup
Most cup-grown plants hit their limit within four to eight weeks. The signs are obvious: roots poking out the drainage holes, visible roots circling the inside of the cup when you tilt it, wilting faster than usual even after watering, or growth that has slowed dramatically. At that point, either harvest everything (for greens and herbs, this is the right move), or transplant to a larger pot or directly into the ground.
To transplant, water the cup thoroughly an hour beforehand so the root ball holds together. Gently squeeze or cut away the cup rather than yanking the plant out. Place the root ball into a pre-dug hole in a larger pot or in-ground bed at the same depth it was sitting in the cup. Firm the soil around it and water again. Avoid fertilizing for the first week after transplanting. The plant needs time to reestablish roots before it can process nutrients efficiently.
If you can't upsize immediately, extend the cup phase by harvesting more aggressively. For lettuce and herbs, cut leaves regularly to slow the plant's push toward bolting. For microgreens, harvest the whole tray at the right window (7 to 21 days) rather than trying to keep them going. Then replant immediately. Staggering new plantings every three to four weeks keeps a continuous harvest going without ever needing a larger container. This succession planting approach is the most practical long-term strategy for cup growing.
Fixing the most common cup-growing problems
Wilting despite watering
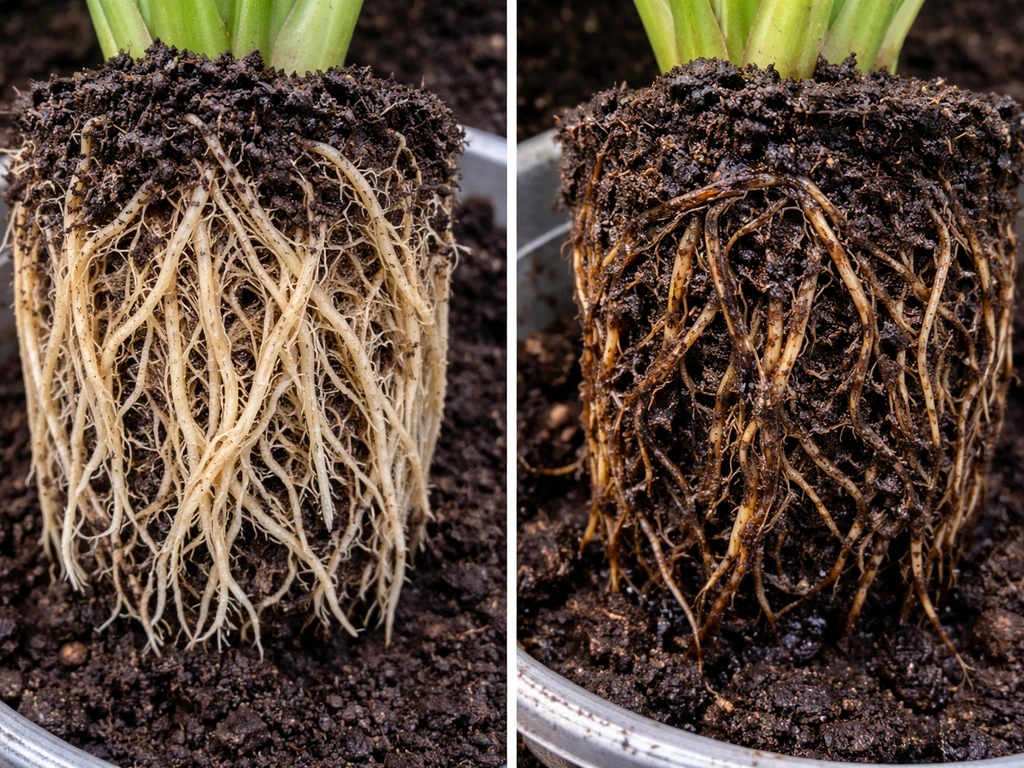
If the plant wilts even after you've watered it, suspect root rot rather than drought. Pull the cup and check the roots. Healthy roots are white or cream-colored. Rotted roots are brown, mushy, and may smell sour. Root rot happens from overwatering in a container without adequate drainage. The fix is to trim rotted roots, repot into fresh dry-ish potting mix with proper drainage holes, and cut back on watering frequency. Prevent it by always confirming the soil feels dry an inch down before watering.
Leggy, stretched growth
Long, pale stems with small leaves reaching in one direction mean the plant isn't getting enough light. This is the most common indoor failure. Move the cup closer to the window, rotate it daily so all sides get exposure, or add a grow lamp. For microgreens specifically, keeping the lamp only about 3 inches above the plants prevents the stretching that makes them weak and flavorless. If the plant is already leggy, cutting it back and giving it more light will help, but badly stretched seedlings rarely fully recover. Start fresh in a brighter location.
Mold on the soil surface
White fuzzy mold on the top of the soil is usually harmless saprophytic fungi feeding on organic matter in the potting mix. It's more common when the surface stays perpetually damp and airflow is low. Improve airflow around the cup, let the top inch of soil dry out between waterings, and remove the moldy layer with a spoon. It's rarely a death sentence for the plant, but it's a sign you're keeping the surface too wet.
Yellowing leaves and slow growth
Pale yellow leaves on a plant that's been growing three to four weeks usually signal nutrient depletion. The starter nutrients in potting mix don't last forever in a small volume. Start a weekly dilute liquid fertilizer regimen as described above. If the yellowing starts from the bottom leaves upward, it's often a nitrogen deficiency, and a balanced liquid fertilizer with decent nitrogen content (the first number in the NPK) fixes it quickly in most cup crops.
Plants drying out too fast
A cup that needs water every single day is probably too small for the plant's current root mass, or it's sitting in direct sun in summer heat. Either transplant to a larger pot, move the cup to a cooler or slightly shadier spot, or use a cup with slightly more soil volume. Grouping cups together can also reduce evaporation from individual containers by raising the local humidity slightly around the plants.
Cup growing is genuinely one of the most accessible starting points in container gardening, and it connects directly to the same principles at play in any limited-substrate environment, from plants growing in bark or driftwood to aquatic setups in narrow vessels. The constraints are the same: match root volume to container volume, control moisture, and give the plant the light its ecology actually demands. Get those fundamentals right and a cup is enough to grow real food or living plants within days. Woody plants are typically defined by having stems that persist above ground and develop durable, lignified tissue over time what are woody plants grow. If you want to get creative, the same principles can also help with plants that can grow in wine bottles.
FAQ
What’s the best “starter” plant for someone trying plants that can grow in cups for the first time?
Start with microgreens or radishes. They’re fast, forgiving if you miss a feeding schedule early, and you can see results within days to a few weeks, which makes troubleshooting much easier than with slow crops.
Do cups have to be the exact size mentioned, or can I use smaller cups and still succeed?
Smaller cups can work only with crops that stay shallow. If your cup holds significantly less soil depth than about 4 to 5 inches, skip lettuce and radishes and move to microgreens or very short herbs, because mature root volume will hit the container limit quickly.
Can I reuse the same cup and potting mix for a second planting?
You can reuse containers after washing, but reuse of old mix is often risky because nutrients drop and disease organisms can persist. For best results, empty and refresh with new container potting mix, especially if you had mold, fungus, or suspected root rot.
How do I know when my cup plant is root-bound versus just thirsty?
If the soil is dry an inch down and watering helps briefly, it’s likely thirst. If watering doesn’t restore turgor, you see roots circling through the drainage holes, or the plant wilts fast even with moist soil, treat it as root-bound or possible rot and switch to checking roots.
Is it okay to mist leaves instead of watering the soil?
Misting can help with surface feel, but it usually won’t replace watering because roots need moisture in the root zone. Water the soil slowly until it drains, especially in cups where the top can look fine while the lower mix dries or stays waterlogged.
What’s the safest way to water when using a saucer under the cup?
Never let the cup sit in standing runoff. Empty the saucer after watering, or water in a way that drains out fully before you put the cup back on the tray, so roots don’t drown and mold doesn’t get constant moisture.
How often should I rotate the cups near a window?
Rotate daily if possible, or at least every day or two. Small rotations prevent one-sided leaning and reduce the chance you’ll think you need more fertilizer when the real issue is uneven light exposure.
Can I grow leafy greens in cups year-round indoors?
Yes, but expect slower growth in winter unless light is strong. If natural light is limited, use a grow lamp on a consistent schedule and keep it around the recommended distance to avoid leggy growth.
Why do my microgreens get “mushy” or develop a bad smell?
Most often it’s overwatering or poor airflow, not the seeds themselves. Use drainage, water lightly enough to keep mix evenly moist but not wet, and don’t let the surface stay constantly damp, because that’s when rot signals show up.
Should I fertilize immediately after transplanting a cup plant into a larger container?
Hold fertilizer for about a week after transplanting. The roots need time to reestablish, fertilizing too soon can stress new roots and increase salt buildup before the plant can take it up.
Can I grow strawberries in a cup the way I would in a pot?
Not reliably. Strawberries need a larger, deeper container than a typical cup to produce well, if you try anyway you’ll usually get stunting. Use a bigger pot if you want strawberries as a true long-term cup-free harvest plan.
My soil surface has white fuzzy mold, should I throw everything away?
Usually no. It’s commonly a harmless surface fungus when the top stays damp and airflow is low. Improve airflow, let the top inch dry between waterings, and remove the moldy layer carefully, then watch for changes in plant vigor.
What’s the quickest “next step” when a cup plant starts turning pale yellow?
First confirm light is adequate, then check timing. If it’s after about three to four weeks, start a dilute balanced liquid feed weekly. Pale yellowing that climbs from older leaves upward often responds better to a nitrogen-leaning balanced fertilizer.
How do I prevent summer heat from killing roots in plants that can grow in cups?
Avoid hot concrete surfaces, elevate the container, and give midday shade. In extreme heat, indoor cooling or relocating cups during peak sun can be the difference between steady growth and sudden wilt.
When my cup plant has outgrown the container, is harvesting always better than transplanting?
For leafy greens and herbs, aggressive harvesting is often best and keeps the plant producing without a container upgrade. For crops where quality depends on underground growth or when you see roots circling heavily, transplanting to a larger pot or the ground is more likely to restore steady growth.
Can I stack multiple plants in one cup to get more food from less space?
It’s usually a mistake unless they’re tiny and spaced well, because overcrowding raises humidity around leaves, competes for light, and accelerates root depletion in a small soil volume. For cups, one main plant per cup is a safer default, microgreens can be denser since you harvest them young.