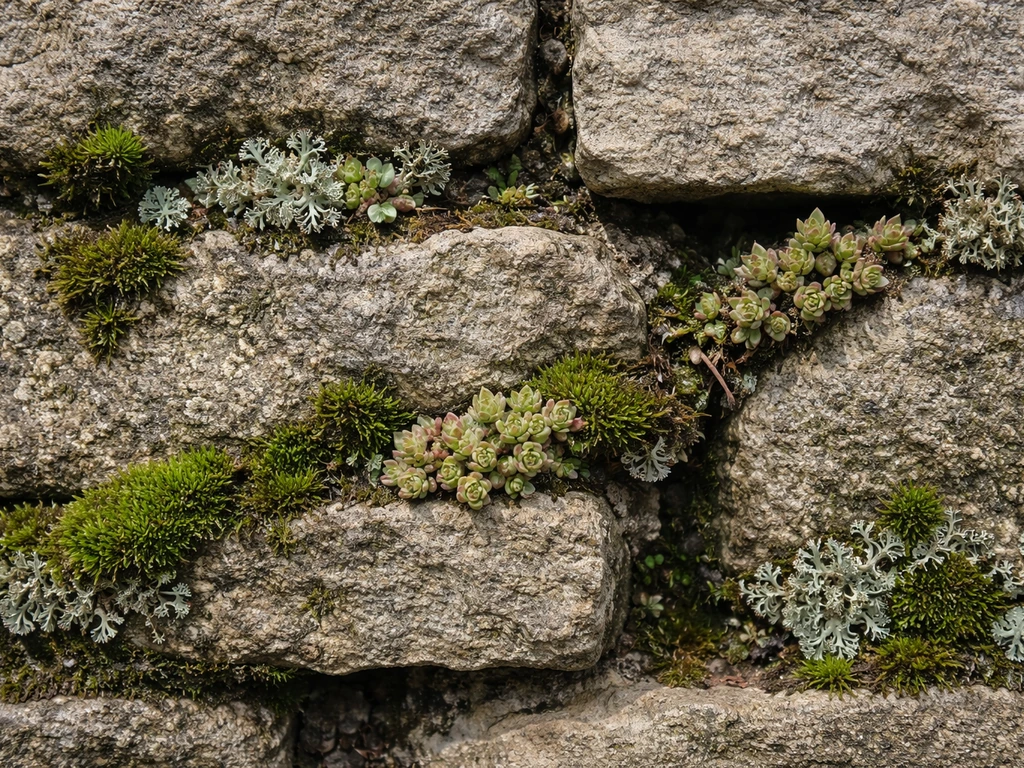
Stone walls grow mosses and lichens first, then ferns and flowering plants like wall pepper (Sedum acre), ivy, polypody fern, and a long tail of opportunistic weeds and grasses, depending on how much light, moisture, and accumulated organic matter the wall offers. The exact mix you find depends on which way your wall faces, how old it is, what the stone is made of, and whether the joints are open or mortared. A sunny south-facing wall and a shaded north-facing wall in the same garden can host completely different plant communities.
What Plants Grow in Stone Walls: A Practical Guide

Dr. Marcus Weatherby
24 May 2026
Why stone walls become plant habitats in the first place
A stone wall isn't just inert masonry. Every crack, joint, and ledge is a microclimate with its own temperature range, moisture level, wind exposure, and substrate depth. That variation is exactly why walls can host more plant diversity per square meter than the surrounding ground.
Sun exposure is the biggest dividing line. A south- or west-facing wall absorbs heat through the day and radiates it back at night, keeping surface temperatures high and drying out joints fast. That selects for drought-tolerant succulents, certain pioneer lichens, and annuals that can race through their life cycle before summer drought hits. A north- or east-facing wall stays cooler, holds moisture longer, and consistently produces ferns, mosses, and shade-tolerant cryptogams instead.
Wind matters too. Exposed capstones and the top courses of a wall are far harsher environments than the sheltered interior joints lower down. Ivy, for example, specifically seeks out eroded mortar joints partly because those crevices protect stems from desiccating wind. Deep crevices trap a layer of humid air that shallow ledges can't offer.
Moisture and soil depth determine which plants can persist long term. Thin crevices with no real soil accumulation support only cryptogams (mosses, lichens, algae) and extreme drought-tolerant succulents. Cryptogams in wall niches, like early colonizers, can persist under harsher dry or exposed conditions before humus accumulates enough to support later vascular plants cryptogams in wall niches can persist under harsher dry or exposed conditions. Over years, organic debris, wind-blown dust, and decaying cryptogam matter builds up into a thin humus layer in joints. Once that layer reaches even a centimeter or two, ferns and small flowering plants can establish from spore or seed. Thick ledges, collapsed sections, and capstones with accumulated debris can build soil pockets deep enough for grasses and even small shrubs.
Stone type also plays a role at the cryptogam level. Limestone supports different lichen and moss assemblages than sandstone or granite, because pH and surface texture affect spore adhesion and moisture retention. You'll notice more lime-loving species on old mortared walls and calcareous rubble than on acid granite walls in the same area.
The pioneers: what grows in cracks and mortar joints
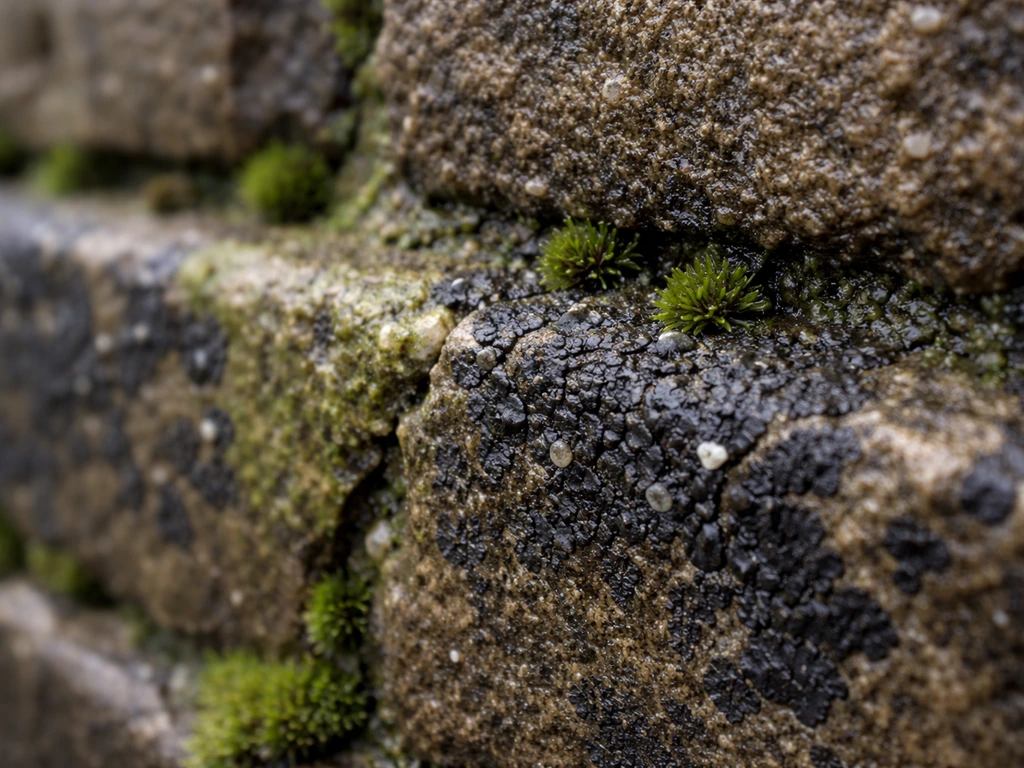
The very first colonizers are never the ones people notice. Algae form thin green or black films on damp stone within months of a wall being built. Fungi follow, then crustose lichens that are essentially glued to the stone surface. These aren't just decoration. They physically break down the stone surface and begin accumulating organic material that later plants depend on. A wall survey in the Mendips found 23 lichen species and 51 bryophyte species alongside 75 vascular plants on a single dry-stone-wall site, which gives you a sense of how rich that cryptogam base can get.
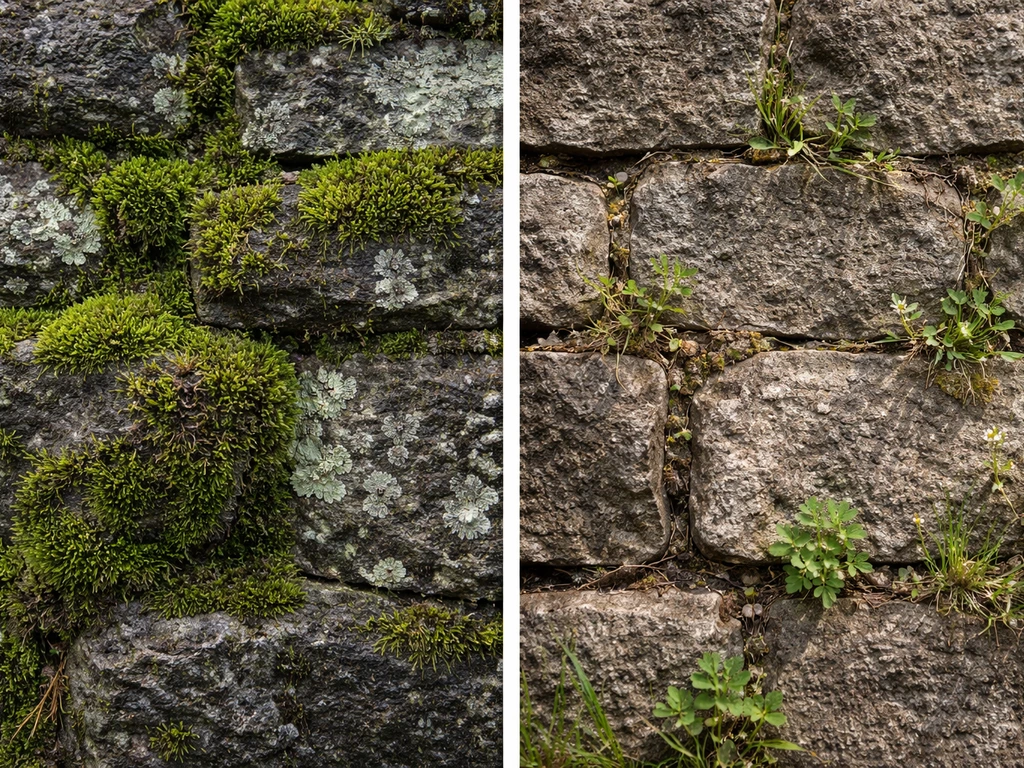
Mosses move in as soon as moisture and organic debris reach a minimum threshold. Shaded walls can be dominated almost entirely by bryophytes and macrolichens, particularly on older walls where joints have softened and roughened. These are the species you'll typically find on north-facing surfaces or anywhere the stone stays damp for more than half the day.
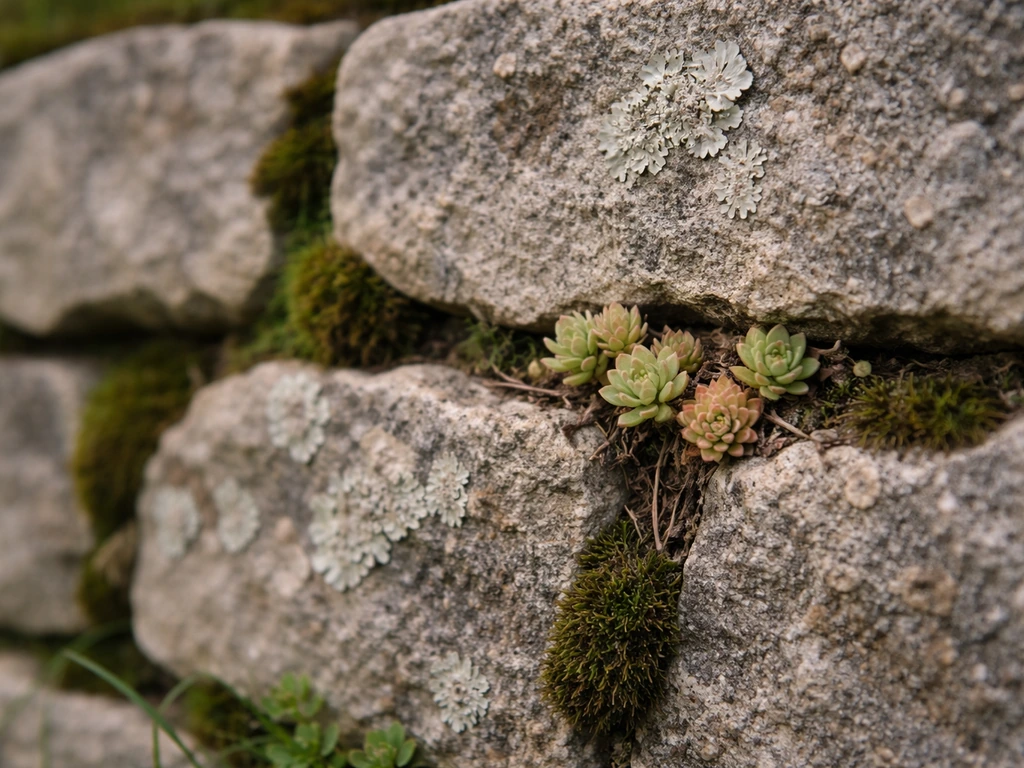
Once a thin humus layer forms in a joint, vascular pioneer plants arrive. The most consistent one across temperate climates is wall pepper, or biting stonecrop (Sedum acre). It has small, fleshy, egg-shaped leaves packed tightly along short stems, it roots into tiny crevices with almost no soil, and it tolerates drought that would kill most plants. It's the stonecrop you see sprawling across sun-baked mortar lines and pavement edges in June and July when it flowers bright yellow. Look for the fleshy, almost succulent texture of the leaves as the key ID trait in a crevice.
Polypody fern (Polypodium vulgare and relatives) is the fern equivalent of wall pepper for shaded joints. It spreads by rhizome through cracks, tolerates dry periods better than most ferns, and will persist on north-facing joints for decades once established. Wall rue (Asplenium ruta-muraria) and maidenhair spleenwort (Asplenium trichomanes) are the two spleenworts most commonly seen in actual wall crevices across Europe and the northeastern US. They're small, tufted, and almost always rooted directly into open mortar joints rather than onto ledges.
Annual and biennial weeds also use mortar joints as a germination site, especially where joints have eroded and accumulated soil. You'll find shepherd's purse, hairy bittercress, and groundsel working their way into cracked sections, completing their life cycles quickly before the substrate dries out. Grasses like annual meadow grass do the same. These are opportunists rather than true wall specialists, but they're often the most visible plants on a wall because they grow quickly and get large.
Plants for ledges, capstones, and deeper soil pockets
Ledges and capstones are a completely different environment from crevices. They get more light, more rain hitting from above, more frost exposure, and sometimes significantly more accumulated soil. If a wall has been partly collapsed and rebuilt or has sections where rubble has piled up, you're looking at something close to a rocky embankment rather than a true crevice habitat.
Houseleek (Sempervivum tectorum) is a classic capstone plant. It forms flat rosettes and spreads vegetatively, tolerating the freeze-thaw cycling and drought that a sun-exposed wall top delivers. Sedum species generally do well here too, particularly where the substrate drains fast. These plants actually prefer not to sit in standing water, so capstones with good runoff are ideal for them.
Grasses and small herbaceous perennials establish in thicker soil pockets. Depending on your climate zone, you might find red fescue, Yorkshire fog, or wall barley working through soil accumulated behind upper courses. Broader-leaved plants like herb robert (Geranium robertianum), pellitory-of-the-wall (Parietaria judaica in Europe), and common toadflax (Linaria vulgaris) are frequent in thicker joints and at wall bases where soil is deeper. Pellitory is particularly adapted to walls: its common name says it all, and it roots aggressively into soft mortar.
Ivy (Hedera helix) is the big one on older walls with wider joints. It starts in sheltered crevices, uses aerial roots to grip the stone, and can eventually cover a whole wall face. The roots seek out eroded mortar both for purchase and for protection from wind. A well-established ivy plant is almost impossible to fully remove without leaving roots in every joint, which matters a lot if you're trying to manage it on a historic or structurally important wall.
Elder (Sambucus nigra) and buddleia often establish on ruined walls and in collapsed sections where soil has built up enough to sustain a shrub. These are the plants that cause real structural damage because their roots eventually lever stones apart. If you see a multi-stemmed woody shrub growing out of a wall, that's the point where management becomes urgent.
What appears season by season
Mosses and lichens are visible all year but look freshest and most active in autumn and winter when moisture is higher and competing plants have died back. On shaded walls, a winter inspection often reveals the most complete cryptogam picture you'll get.
| Season | What you'll typically see | Key species examples |
|---|---|---|
| Spring | Annual weeds germinating in joints, mosses bright green after winter moisture, ferns unfurling new fronds, early-flowering opportunists | Hairy bittercress, groundsel, polypody fern, wall rue |
| Summer | Peak flowering of stonecrop and other succulents, grasses and herbaceous plants at full height on ledges, ivy growing aggressively | Sedum acre (flowers June–Aug), herb robert, annual meadow grass, ivy |
| Autumn | Annual plants seeding and dying back, mosses and lichens recovering with rain, perennial ferns still present, woody plants visible after leaf drop | Polypody, maidenhair spleenwort, houseleek rosettes |
| Winter | Cryptogams dominant, evergreen ferns visible, ivy and houseleek persistent, stonecrop rosettes low and compact, annuals absent | Polypody, ivy, houseleek, crustose lichens, mosses |
The cryptogam-first model holds true seasonally as well as ecologically. In early spring on a newly exposed or cleaned wall, mosses and algae will be the first things to appear. Vascular plants follow once the organic layer re-establishes, which can take a season or two. If you've recently repointed a wall and wonder why it looks bare, that's why. Give it a year and the pioneer sequence will start again.
How to identify what's already growing on your wall
You don't need to be a botanist to sort wall plants into useful categories. Work through these quick field checks and you'll have a good practical picture within a single visit.
- Check the wall's aspect first. South or west facing and you're looking at a drought-adapted, sun-loving community. North or east facing and you're in shade-moss-fern territory. This tells you more than anything else before you even look at the plants.
- Look at where each plant is rooted, not just where it's growing. A plant rooted into a thin open joint is in a different habitat than one rooted into a thicker soil pocket on a ledge. Joint-rooters are true wall specialists. Ledge plants might just be ordinary ground plants that found a foothold.
- Feel the leaves. Fleshy, water-storing leaves (like stonecrop) mean drought adaptation and thin substrate. Thin, soft leaves mean moisture, shade, and deeper organic matter.
- For mosses vs lichens, gently touch the surface. Mosses feel soft and leafy under your fingers. Lichens are crusty, flat, and firmly attached to the stone surface. You can't peel a crustose lichen off without scraping the stone.
- Check fern frond shape. Wall rue has small fan-shaped pinnules and looks like a tiny rue plant. Maidenhair spleenwort has narrow, oblong pinnules on a dark stem. Polypody has large undivided lobes and is likely the biggest fern on a dry wall.
- For flowering plants, note whether stems are fleshy and succulent (stonecrop family), trailing and hairy (ivy, bittercress), or upright and leafy (herb robert, toadflax). The growth form combined with where the roots are anchored narrows down the ID quickly.
Aspect, root position, leaf texture, and growth form together cover the vast majority of plants you'll encounter. If you are also wondering what plants grow well in stones generally, focus on the same practical clues first: aspect, how deep the crevice soil is, and whether moisture is held or drained. If you want to go deeper, the related question of what plants grow in rock crevices specifically (a broader category that includes cliff faces and natural outcrops) gives useful context for how wall communities compare to natural rocky habitats. These rock-crevice communities are closely related to the types of plants that colonize stone wall joints what plants grow in rock crevices specifically. In the wider question of what can grow on rocks, many of the same pioneers and moisture-driven stages show up beyond walls too. To see what plants grow in river rock, look at similar factors like light, moisture, and how much organic debris and soil builds up between stones what plants grow in rock crevices specifically.
What to do next: encourage, tolerate, or remove
Your approach depends on whether the wall is structurally important, historic, or just a garden feature you want to manage. The calculus is different in each case.
If you want to encourage beneficial wall plants
Mosses, lichens, polypody fern, and stonecrops are all low-impact on wall structure and genuinely interesting ecologically. If your wall already has them, the main thing to do is not to disturb the joint humus or repoint with hard cement that seals the crevices. Leave open joints alone. Avoid pressure washing, which removes the cryptogam layer and sets succession back to zero. If you want to introduce specific plants like stonecrop or houseleek onto capstones, do it by pressing small cuttings or offsets into existing crevices with a little gritty compost in midsummer when they're actively growing. They'll either take or they won't. No need for elaborate planting.
If you need to remove damaging plants
Woody plants and climbers are the ones that cause structural damage, and they're the hardest to remove safely. For ivy, the standard guidance is to cut stems at the base, let the top growth die in place for a season (which makes it easier to pull off without tearing the stone), and then remove the dead stems carefully. The NPS Cultural Resource Management Bulletin similarly emphasizes that, when plants are growing in mortar joints or crevices, hand removal is generally preferred and systemic herbicide use involves tradeoffs that affect stone integrity and access for safe removal cut stems can re-root into joints if left untreated. Do not yank live ivy off a wall. The aerial roots are locked into the mortar surface and will pull facing off with them. Once you've removed the top, treat the cut stump with a systemic herbicide to prevent regrowth, because cut stems can re-root into joints if left untreated.
For elder, buddleia, or other woody shrubs rooted into wall sections, you're dealing with roots that have physically entered mortar joints. Remove the above-ground plant first, then work roots out of individual joints by hand where possible. If roots are extensive, consult a preservation specialist before going further. Aggressive root removal on a dry-stone wall can destabilize whole sections. On a mortared wall, each mortar joint affected needs inspection and repointing after root removal to prevent water ingress, which combined with frost is more damaging to masonry than the plant itself.
For annual and biennial weeds in joints, hand removal before seeding is the most practical approach. Most of these plants have shallow, easy-to-extract roots and don't re-root from stem fragments. Pull them in spring before they flower, and you interrupt the seed cycle. Herbicide use in mortar joints carries a real risk of staining and chemical damage to stone, so it should be a last resort on any wall you care about, and always worth getting specialist advice before applying anything systemic to historic masonry.
The one thing to avoid on any wall you want to preserve is the combination of standing water and vegetation. If you are also looking beyond walls, consider plants that can grow in rocks and water, since many of the same drought-tolerant and moisture-loving strategies show up in nature standing water. Water trapped by vegetation, blocked drainage on horizontal surfaces, and freeze-thaw cycling through winter is what causes the most damage. Keeping capstones and ledges clear of debris and thick vegetation reduces moisture retention, which is the real threat to stone over time.
A note on climate and regional variation
Everything above applies most directly to temperate climates in Europe and the northeastern US, where dry-stone-wall ecology is well studied. In warmer, drier climates, succulent pioneers dominate even more strongly and ferns are less likely in wall joints. In wetter, oceanic climates, mosses and liverworts can be so dominant on shaded walls that they form thick mats with very few vascular plants. In continental climates with severe winters, freeze-thaw damage opens up joints faster, which accelerates succession but also destabilizes walls quickly. The basic framework of cryptogams first, humus accumulation, then vascular plants holds everywhere, but the specific species list shifts considerably by region and even by local valley microclimate.
FAQ
Why do I mostly see moss and lichens on my wall, not larger plants? (Is something wrong?)
Yes. In very small cracks you can get algae first, then crustose lichens and mosses, but you usually will not see ferns or flowering plants unless there is repeated moisture plus a little organic debris to build a humus pocket.
My stone wall looks bare after repointing or cleaning, when will plants return?
If you recently repointed, cleaned, or sealed joints with mortar or cement, the wall often resets to an “early succession” stage (cryptogams first) and can look bare for a season or two. Give it time, and check whether joints are now airtight compared with nearby sections that still support growth.
What is the safest way to clean moss or weeds from a historic stone wall without ruining future plant life?
Avoid aggressive methods like pressure washing and hard cement repointing on walls you want to preserve, because they remove the biological layer that holds moisture and seeds in place. A gentler approach is to leave existing joints alone, only clearing loose debris on ledges to reduce standing water.
Which plants should I remove first if I’m worried about wall stability?
If your goal is to keep the wall stable, the priority plants to manage are woody climbers and shrubs (especially ivy, elder, and buddleia) because their growth can exploit open joints and widen them over time. Low plants like sedums and mosses are typically not the main structural risk.
When is the best time to pull weeds from mortar joints so they do not come back?
Timing matters. For most annual and biennial weeds in joints, the best window is before flowering and seed set, usually spring in temperate climates. Pulling after flowering often means you still spread seed even if you remove the visible plant.
My wall stays wet, what should I fix first, the plants or the drainage?
If standing water persists after rain, your best “diagnostic” is to check horizontal surfaces, capstones, and clogged joints that can’t drain. Vegetation then traps moisture, so thinning growth only helps if you also improve runoff and clear debris that blocks drainage.
Can I transplant wall pepper, houseleek, or polypody fern from elsewhere onto my wall?
In many cases, you can’t successfully transplant wall specialists because they root into tiny crevices and rely on an existing microbial and humus film in joints. The more reliable option is to propagate small offsets into the same kind of crevice where similar plants already survive.
How do I manage ivy or shrubs on a structural or historic wall without damaging the stone?
Yes for woody plants, but do it by strategy. For ivy, cutting stems at the base and leaving the top to die in place reduces tearing, then targeted stump treatment helps prevent regrowth. For shrubs with extensive roots, hand removal can still destabilize masonry, so plan on inspection and possible professional help.
What warning signs indicate a wall plant is actually harming the masonry?
A plant growing from a joint but leaning outward or lifting stones is more concerning than a plant confined to a shallow crevice. Multi-stem woody growth, visible gaps around roots, or new cracking in the same area are stronger warning signs to address promptly.
What non-chemical options work to reduce vegetation on walls while still protecting biodiversity?
If the wall is accessible and you want to discourage regrowth without chemicals, focus on removing fresh sprouts early and improving conditions that favor growth (clear debris, improve runoff, avoid leaving vegetation that traps moisture). For delicate cryptogams, the goal should be reducing damage drivers, not sterilizing the habitat.